
Unleash your inner candy maker with this foolproof caramel recipe that’s perfect for coating apples. Whether you’re prepping for a fall festival or just craving something sweet, this recipe promises a sticky, satisfying treat that’s as fun to make as it is to eat.
Why This Recipe Works
- The combination of brown sugar and corn syrup ensures a smooth, creamy texture without crystallization.
- Heavy cream adds richness, making the caramel luxuriously thick and perfect for adhering to apples.
- A precise temperature guide guarantees your caramel reaches the ideal consistency for dipping.
- Vanilla extract introduces a warm, aromatic flavor that elevates the caramel beyond the ordinary.
- This recipe includes tips for troubleshooting common caramel-making pitfalls, ensuring success every time.
Ingredients
- 1 cup granulated sugar
- 1 cup packed brown sugar
- 1/2 cup light corn syrup
- 1/2 cup unsalted butter
- 1 cup heavy cream
- 1 teaspoon vanilla extract
- 6-8 medium apples, washed and dried
- Wooden sticks or skewers
Equipment Needed
- Heavy-bottomed saucepan
- Candy thermometer
- Wooden spoon
- Parchment paper
- Baking sheet
Instructions
Step 1: Prepare Your Apples
Start by inserting wooden sticks into the top of each apple, ensuring they’re secure enough to hold the weight of the caramel. Line a baking sheet with parchment paper and set aside. This setup will be your caramel apple drying station, so make sure it’s within easy reach of your stove.
Step 2: Combine Sugars and Syrup
In your heavy-bottomed saucepan, combine the granulated sugar, brown sugar, corn syrup, and butter over medium heat. Stir constantly with a wooden spoon until the butter is melted and the sugars are dissolved. This is your foundation, so take your time to avoid any graininess.
Step 3: Add Heavy Cream
Once the sugars are fully dissolved, slowly pour in the heavy cream while stirring continuously. The mixture will bubble up, so be cautious. Continue to cook, stirring occasionally, until the mixture reaches 245°F on your candy thermometer. This is the soft-ball stage, crucial for the perfect caramel consistency.
Step 4: Remove from Heat and Add Vanilla
As soon as your caramel hits 245°F, remove the saucepan from the heat. Stir in the vanilla extract, which will add a depth of flavor. Let the caramel cool slightly, about 5 minutes, to thicken up a bit before dipping.
Step 5: Dip and Set Your Apples
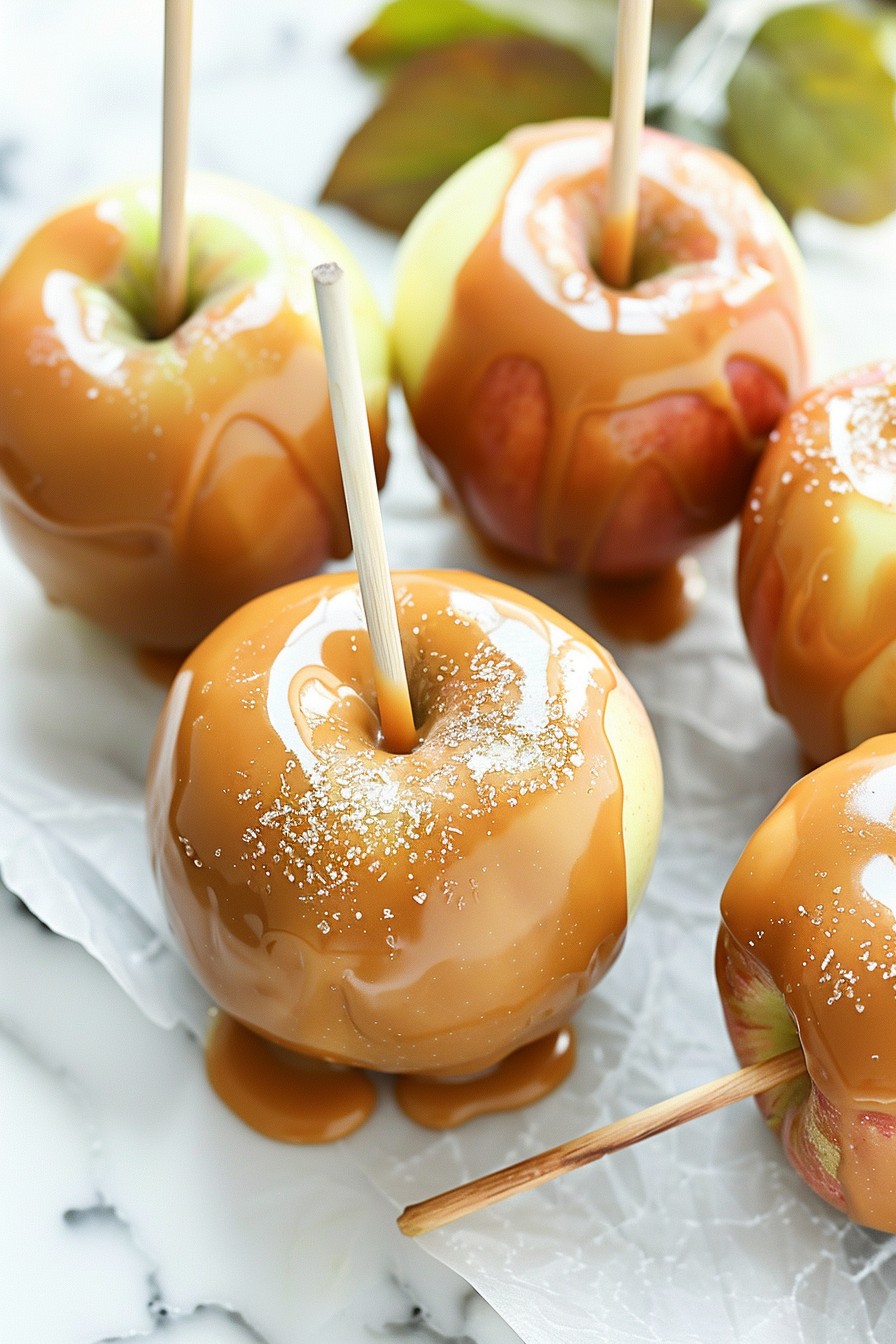
Holding an apple by its stick, dip it into the caramel, swirling to coat evenly. Allow excess caramel to drip off, then place the apple on the prepared baking sheet. Repeat with remaining apples. Let them set at room temperature until the caramel is firm, about 30 minutes.
Tips and Tricks
Making caramel can be tricky, but with these tips, you’ll be a pro in no time. Always use a heavy-bottomed saucepan to distribute heat evenly and prevent burning. If your caramel starts to separate, a splash of hot water can help bring it back together. For a smoother finish, strain your caramel through a fine-mesh sieve before dipping. And remember, patience is key—rushing the process can lead to grainy or burned caramel.
Recipe Variations
- For a salted caramel twist, sprinkle a pinch of flaky sea salt over the caramel-coated apples before they set.
- Add a crunch by rolling the dipped apples in chopped nuts, sprinkles, or crushed cookies immediately after coating.
- For a chocolatey version, drizzle melted chocolate over the set caramel apples.
- Experiment with flavors by adding a teaspoon of cinnamon or pumpkin spice to the caramel mixture.
- For a healthier option, use coconut sugar and coconut cream as substitutes, though the texture and taste will vary.
Frequently Asked Questions
Can I make this caramel recipe without a candy thermometer?
While a candy thermometer is highly recommended for precision, you can test the caramel’s readiness by dropping a small amount into cold water. If it forms a soft ball that flattens when removed, it’s ready. However, this method requires experience and may not be as reliable as a thermometer.
How do I store leftover caramel apples?
Leftover caramel apples can be stored in the refrigerator for up to 3 days. Place them in an airtight container with parchment paper between layers to prevent sticking. Note that the caramel may become harder when chilled.
Why did my caramel turn out grainy?
Grainy caramel is often the result of undissolved sugar crystals. To prevent this, ensure all sugar is dissolved before bringing the mixture to a boil, and avoid stirring once it starts boiling. If crystals form on the sides of the pan, brush them down with a wet pastry brush.
Summary
This ultimate caramel recipe for caramel apples is your ticket to creating a classic treat with a perfect balance of sweetness and texture. With detailed instructions, helpful tips, and creative variations, you’re equipped to make this sticky delight your own. Happy dipping!